We will see how to build a Windmill workflow that can be triggered by the Supabase Database Webhooks.
This guide assumes that you already have a Supabase project where you have admin rights. Some experience with Windmill helps, but not required.
Supabase Database Webhooks allow you to send real-time data from your database to Windmill whenever a table event occurs.
You can hook into three table events: INSERT, UPDATE, and DELETE. All events are fired after a database row is changed.
We will leverage Windmill Webhooks that allow triggering
Windmill Scripts and Flows via HTTP POST requests.
Create Windmill Script
In order to be able to receive the events from Supabase we need to create a Script that will be triggered by the Supabase webhook. Let's create a simple one, that will just return the event payload.
Navigate to the Home page and click "+Script" to create a new Script.
Name it supabase_hook, add the summary "Supabase hook" and click "Next". Paste
the following code in the editor and click "Save":
export async function main(
	table: string,
	schema: string,
	type: string,
	record: Record<string, any>,
	old_record: Record<string, any>
) {
	return {
		table,
		schema,
		type,
		record,
		old_record
	};
}
Supabase will send a payload containing fields exactly the like the arguments of
the main function: table, schema, type, record, old_record.
When the Script is saved, you'll be navigated to the detail page for it. Scroll down to the "Webhooks" section and click "Create token" - you'll need it to authenticate requests coming from Supabase.

In the open drawer, click "Create token" once more, enter the label
supabase-token and add an expiration date that makes sense for you. Finally,
click "New token" and copy the generated token - make sure you don't lose
it.

After you got your token, save the Path endpoint of the webhook for the Script
as well. You'll need both to configure the Supabase webhook in the next step.
Propagate events from Supabase
At the time of writing, Supabase Database Webhooks are NOT production ready. Please treat it accordingly.
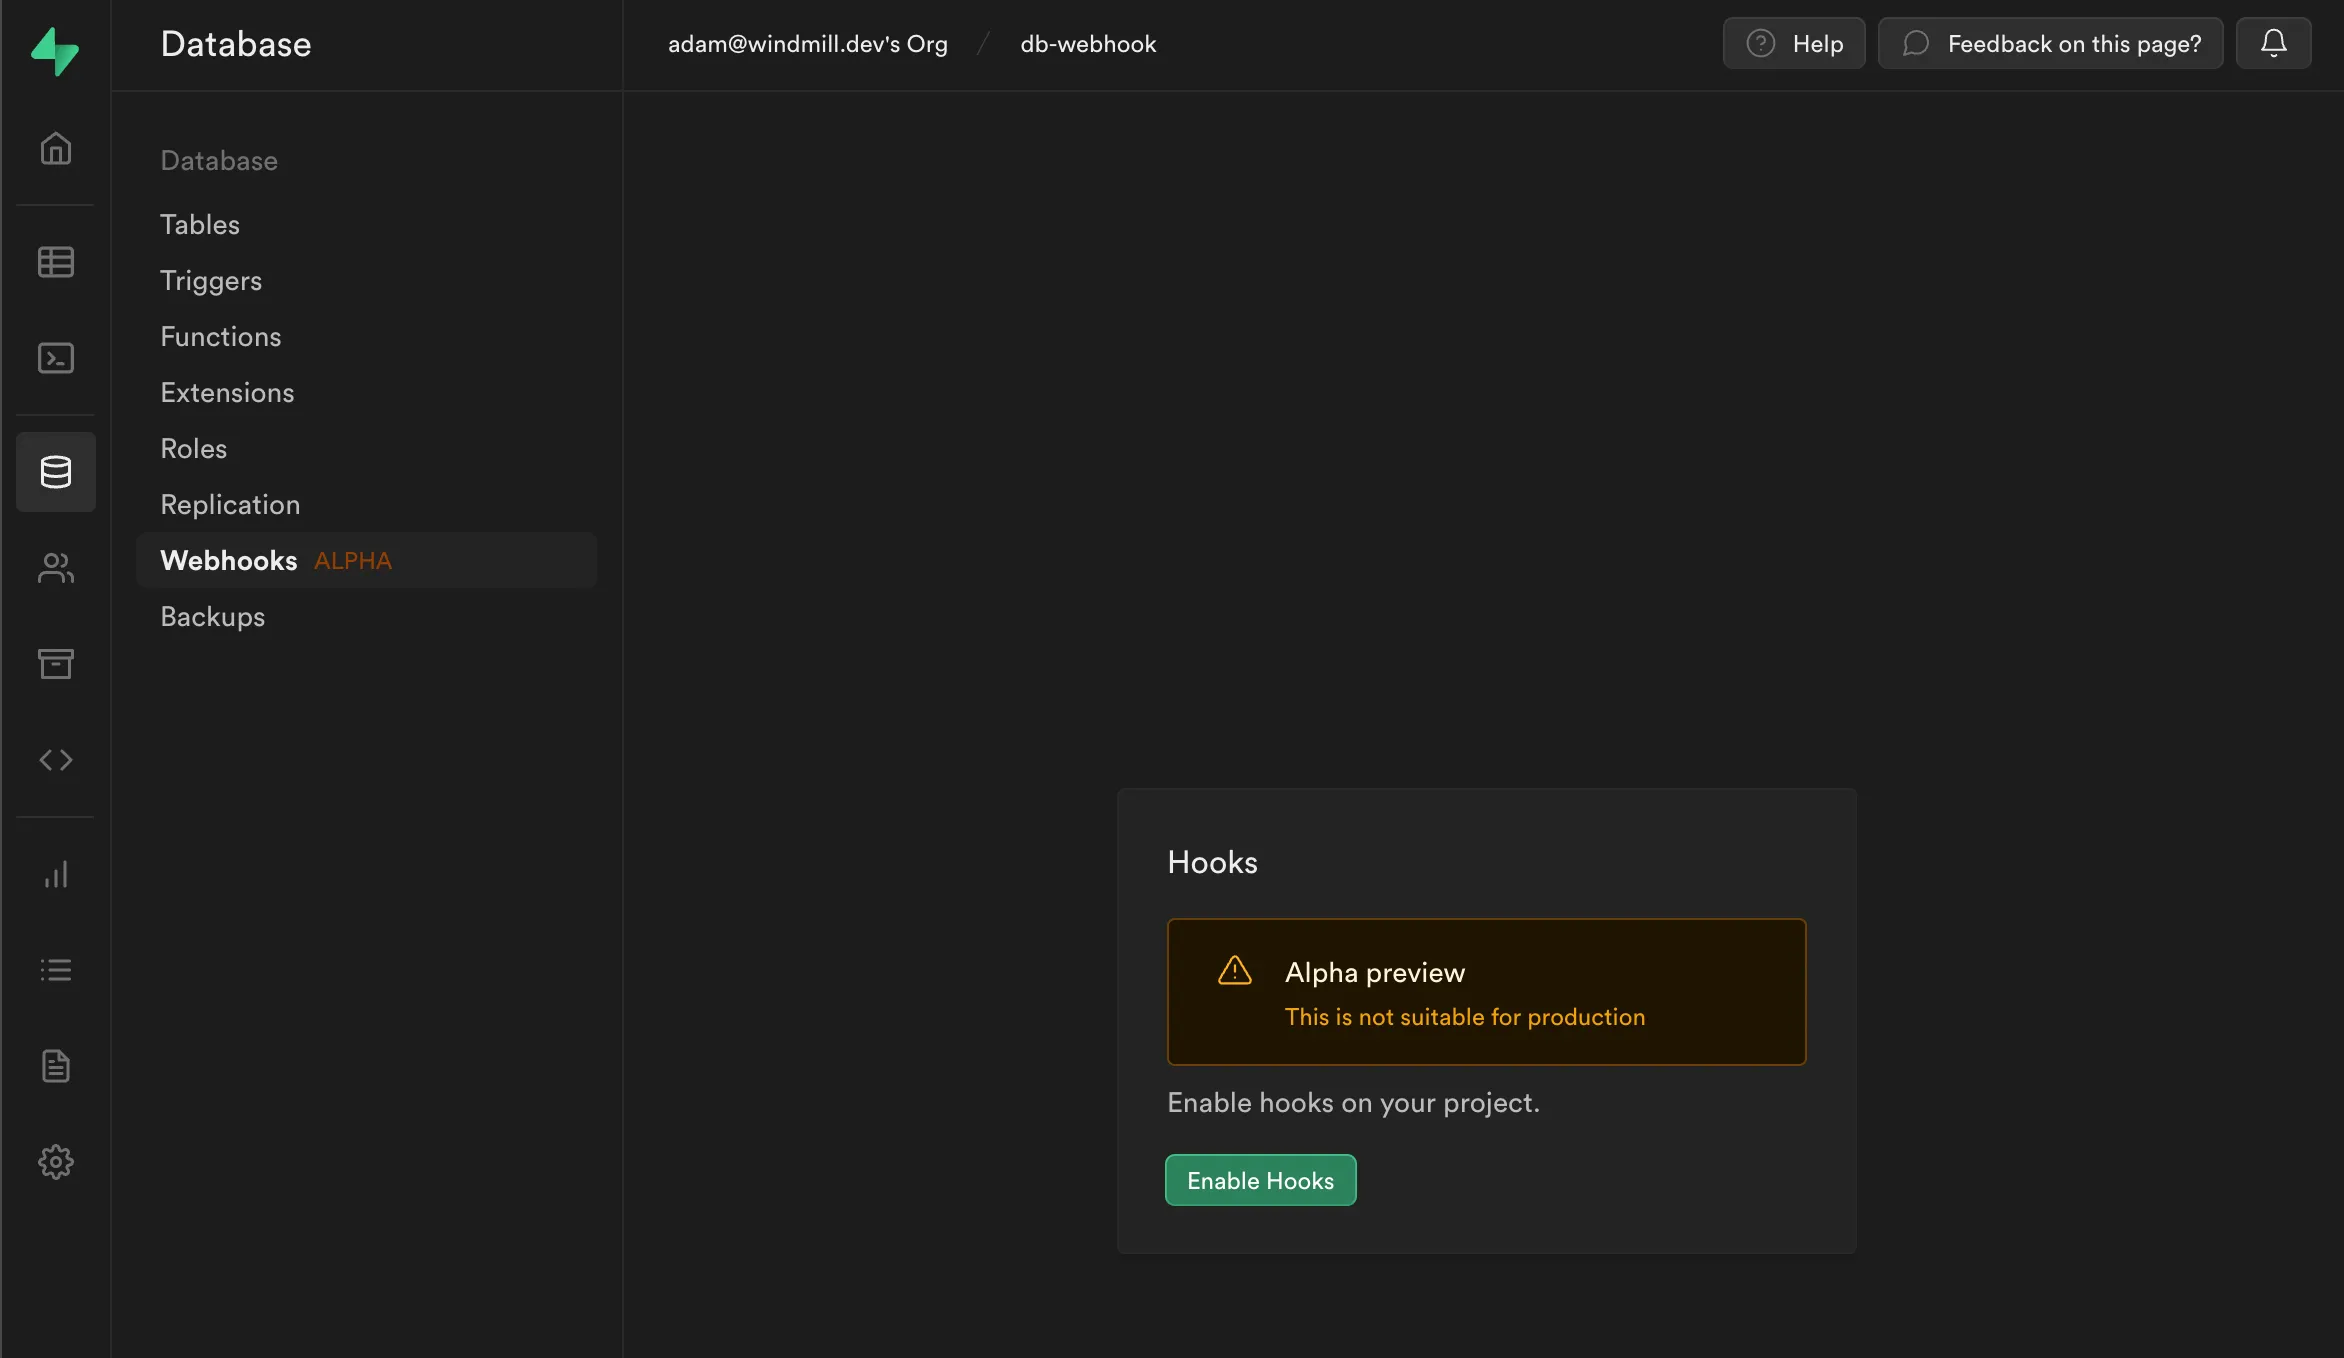
Go to your Supabase project and select "Database" from the left menu, then click the "Webhooks" submenu. Click "Enable Hooks", then click "Create Webhook".
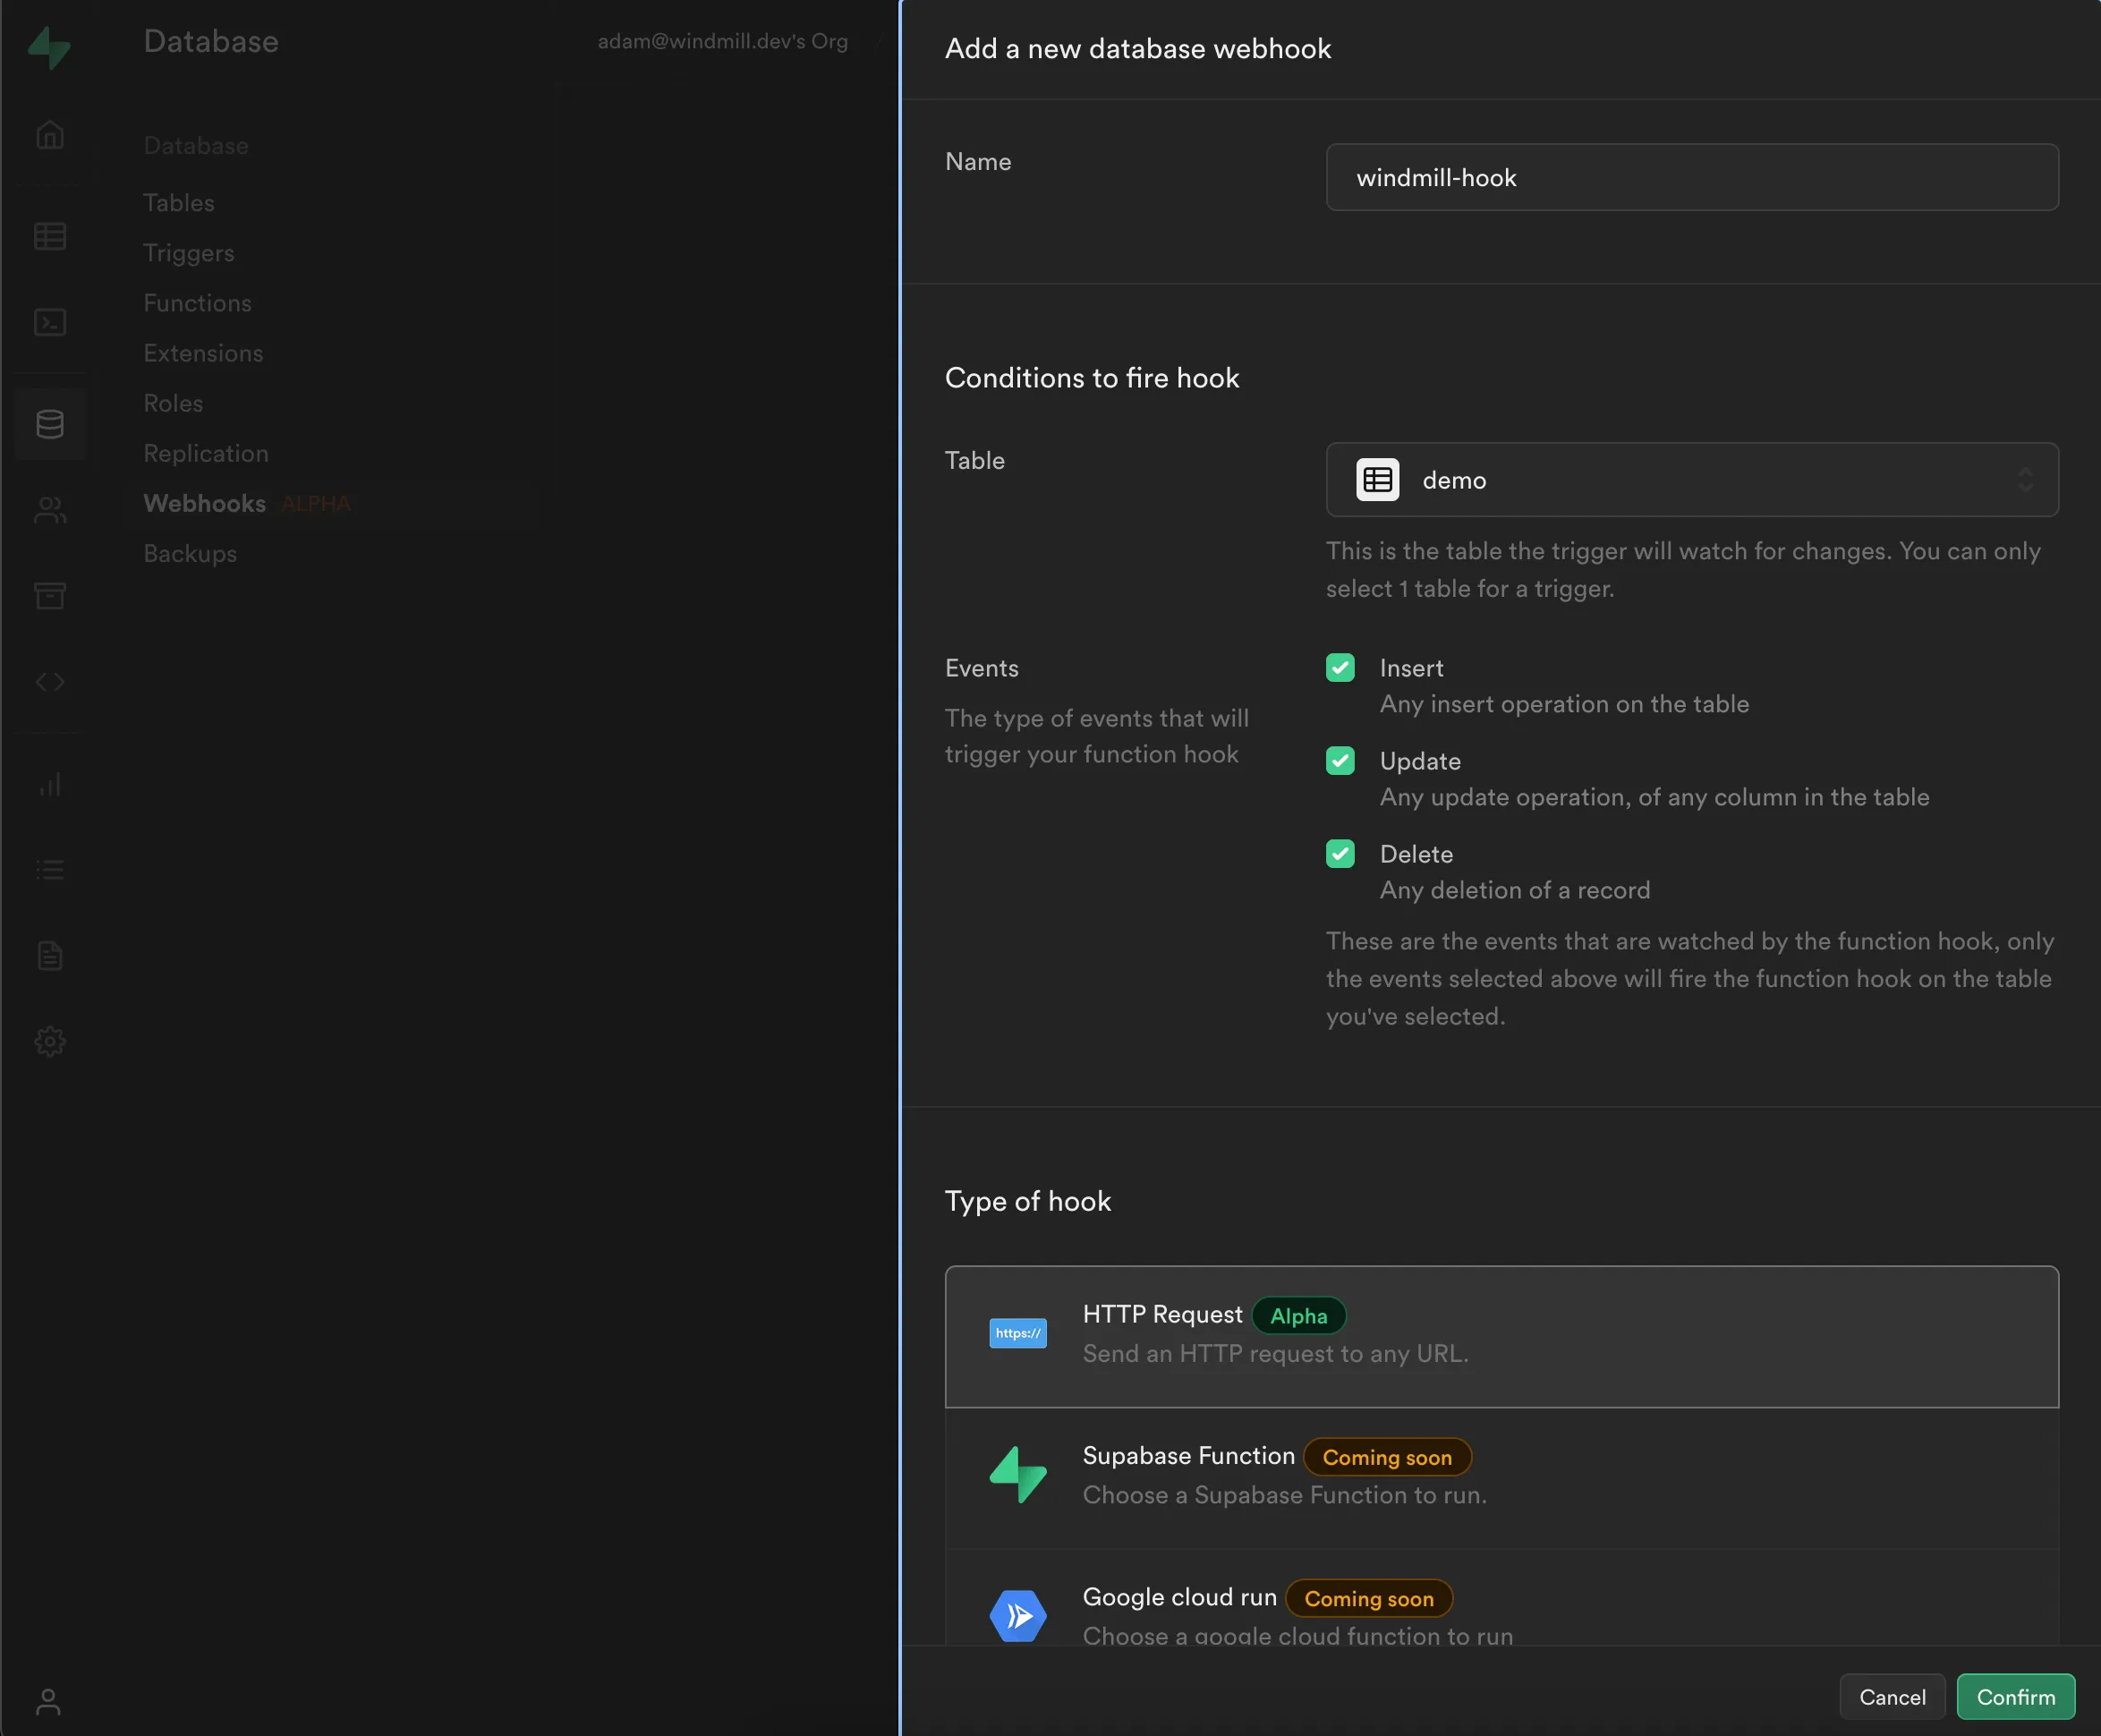
Name the webhook windmill-hook, select the table you want to emit the events
from, subscribe to INSERT, UPDATE and DELETE events and select the
HTTP Request hook type and scroll down for further configuration.
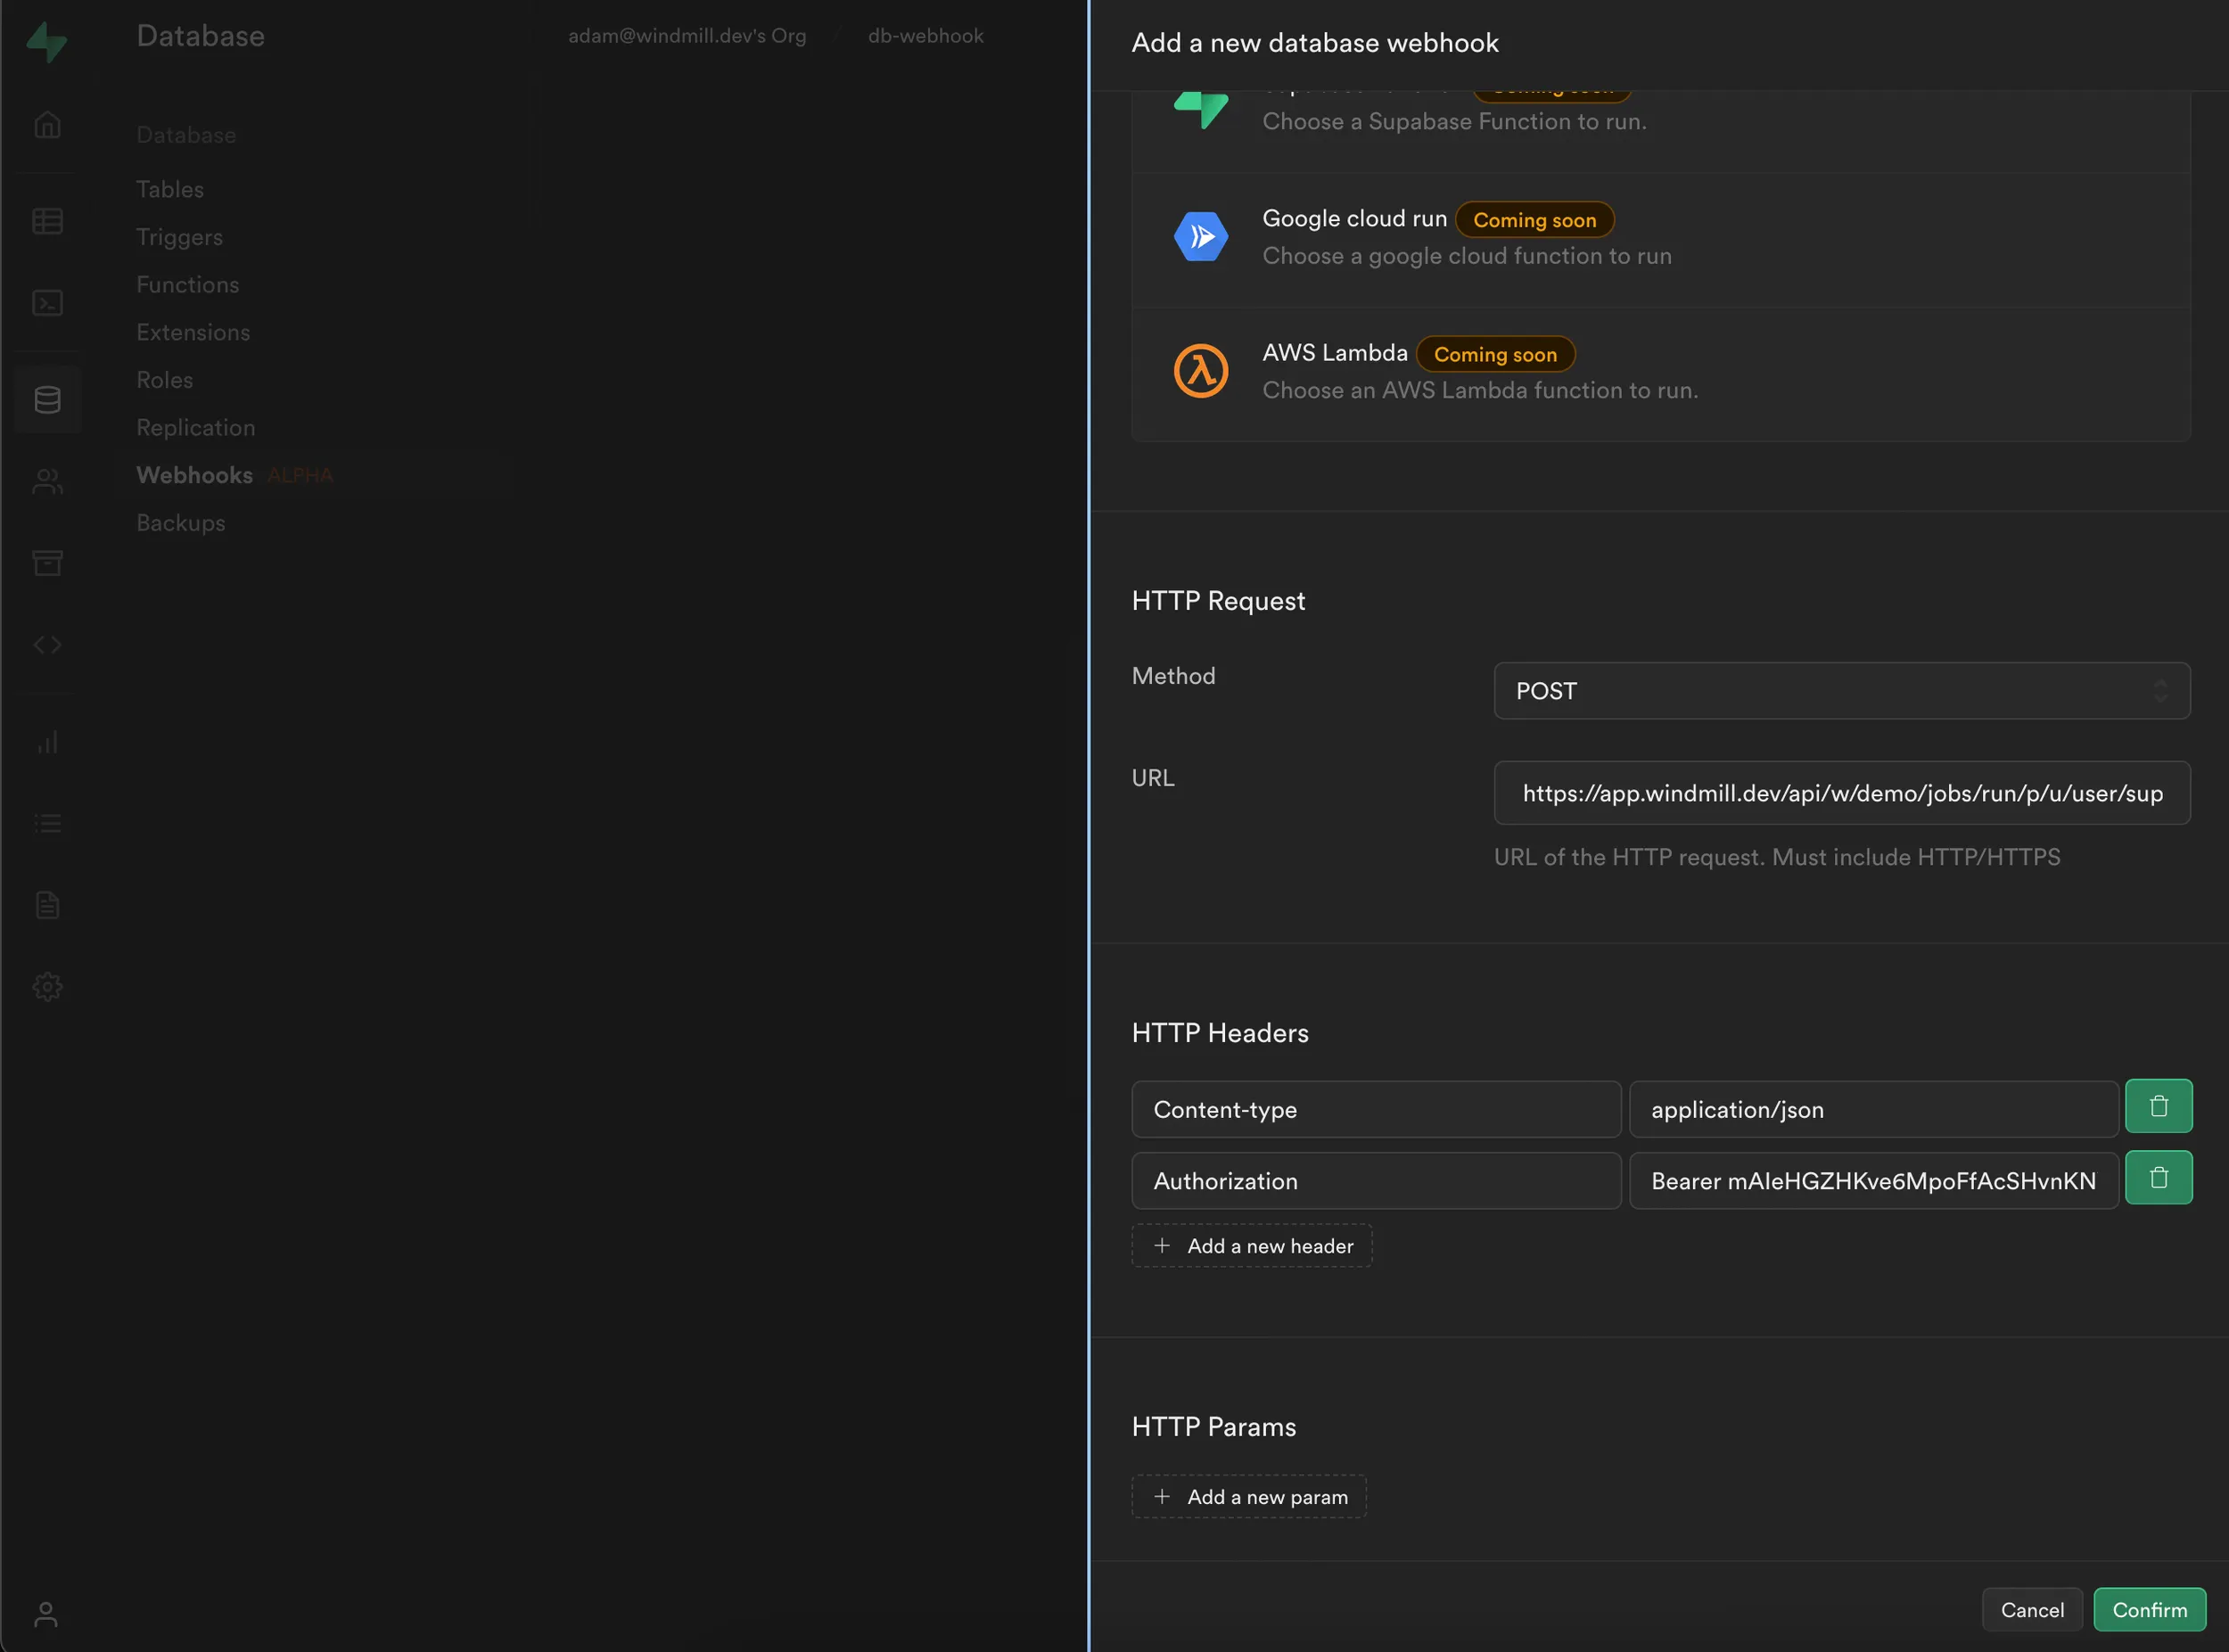
Make sure to select the POST HTTP Request method, paste the Script webhook URL
and then add the Authorization header with a value like Bearer <YOUR_TOKEN>.
Finally, click "Confirm".
Notice the Bearer keyword and the space before the actual token.
Congratulations! Your database events will be propagated from Supabase to Windmill now.
Test integration
Let's check if all this works. Navigate to the "SQL Editor" page in your Supabase project and click "New query" in the top left corner. You will have to configure your own SQL query because only you know what fields are required in your database.
Make sure that you insert value in the table that you've setup the webhook with.
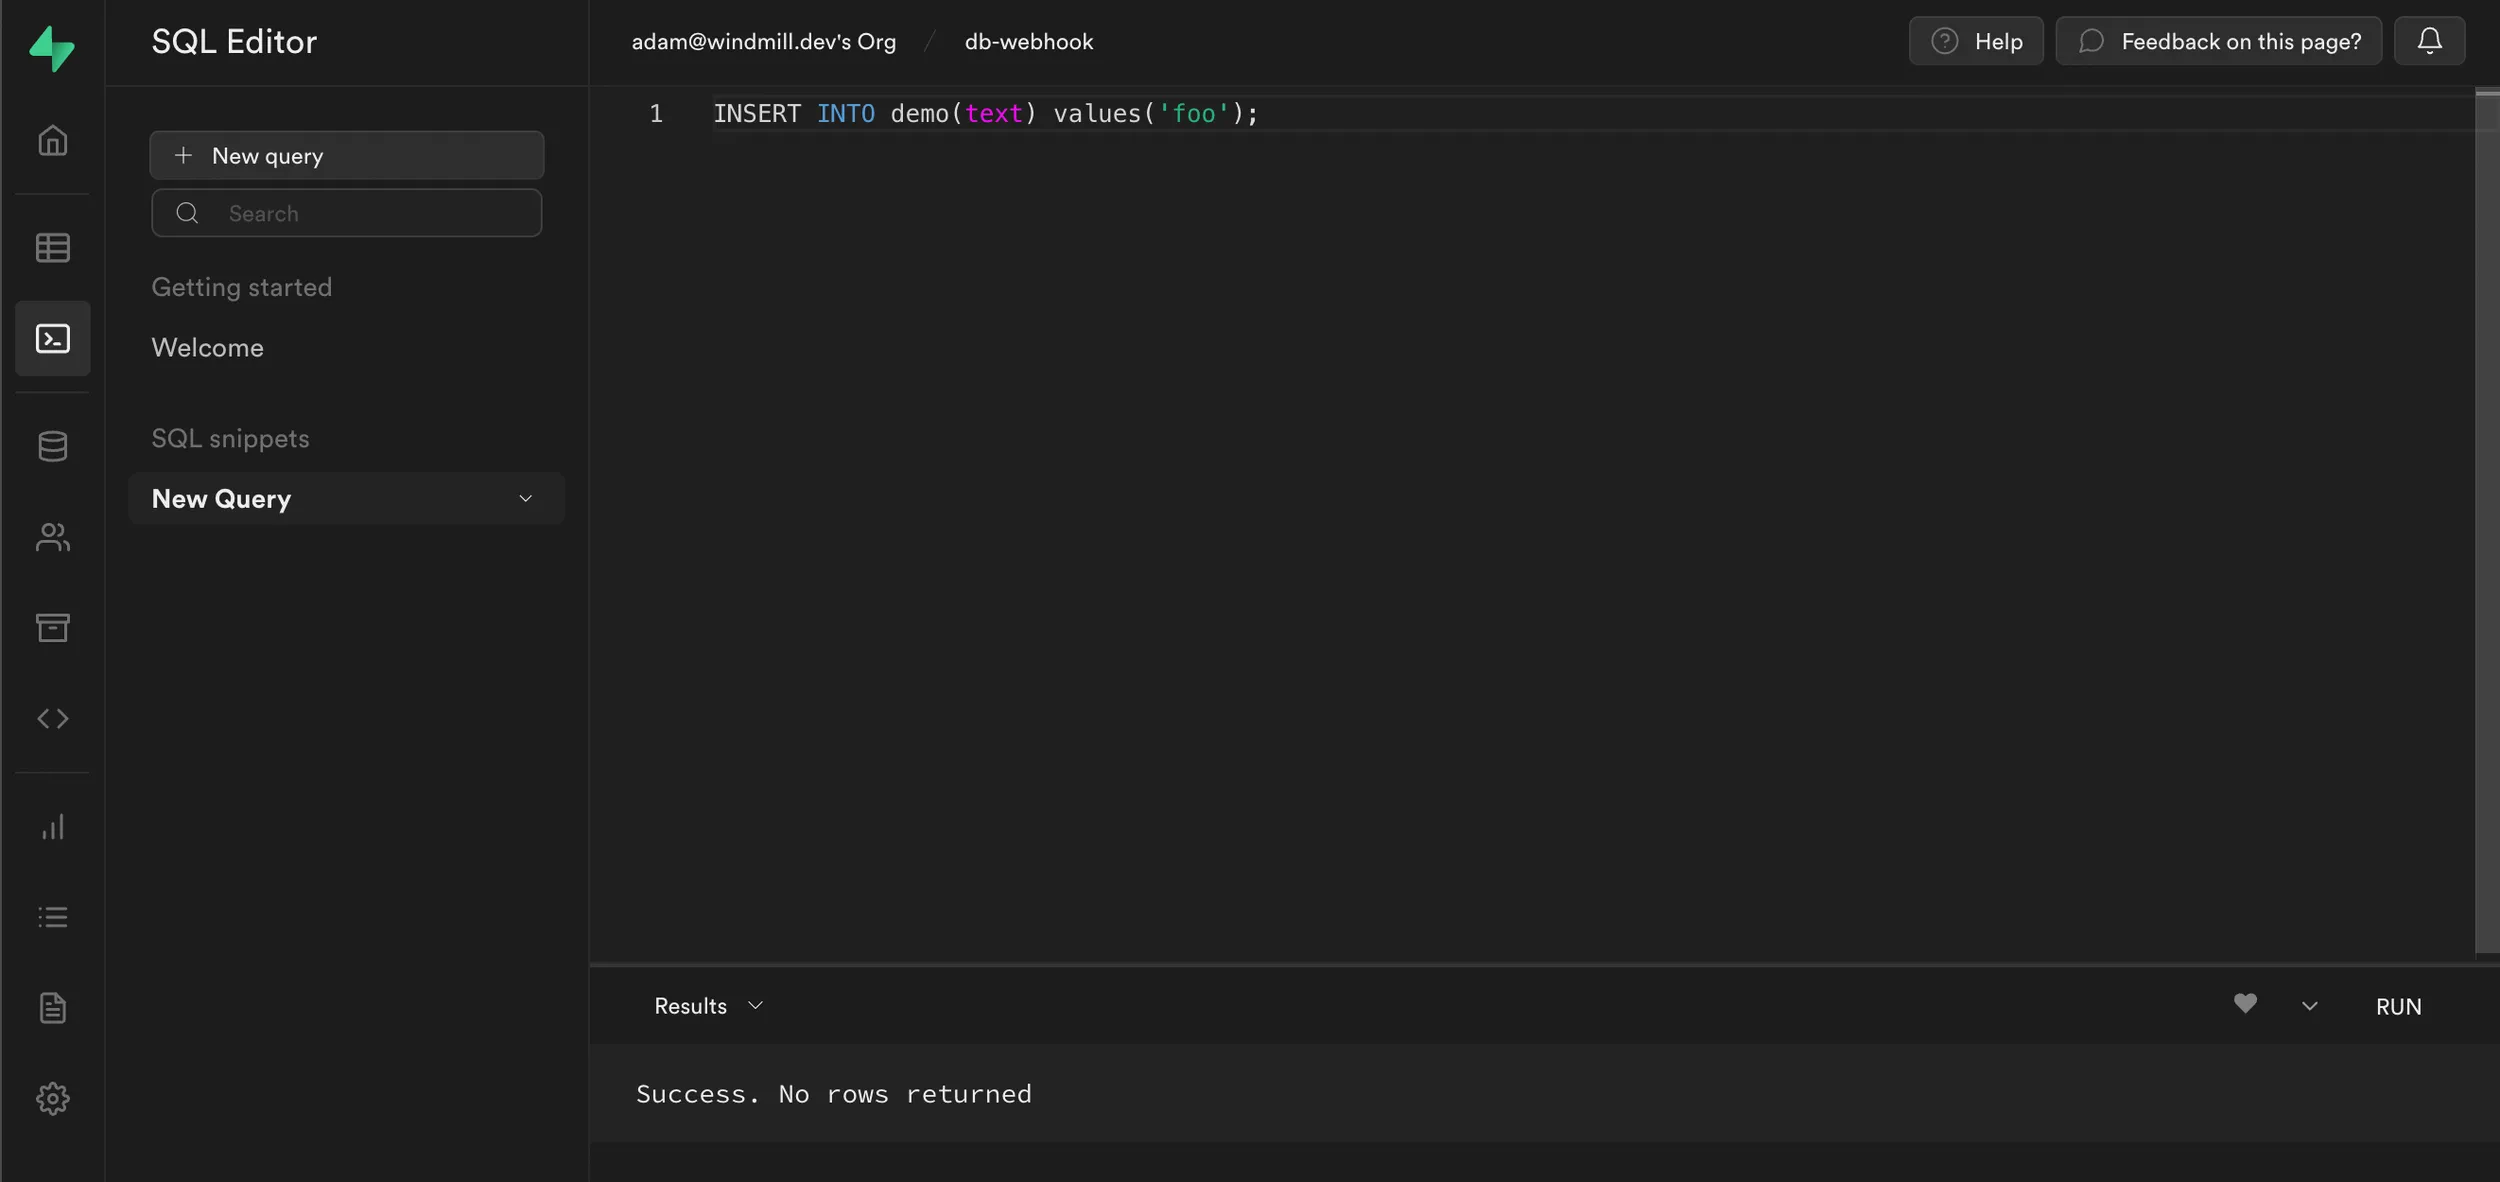
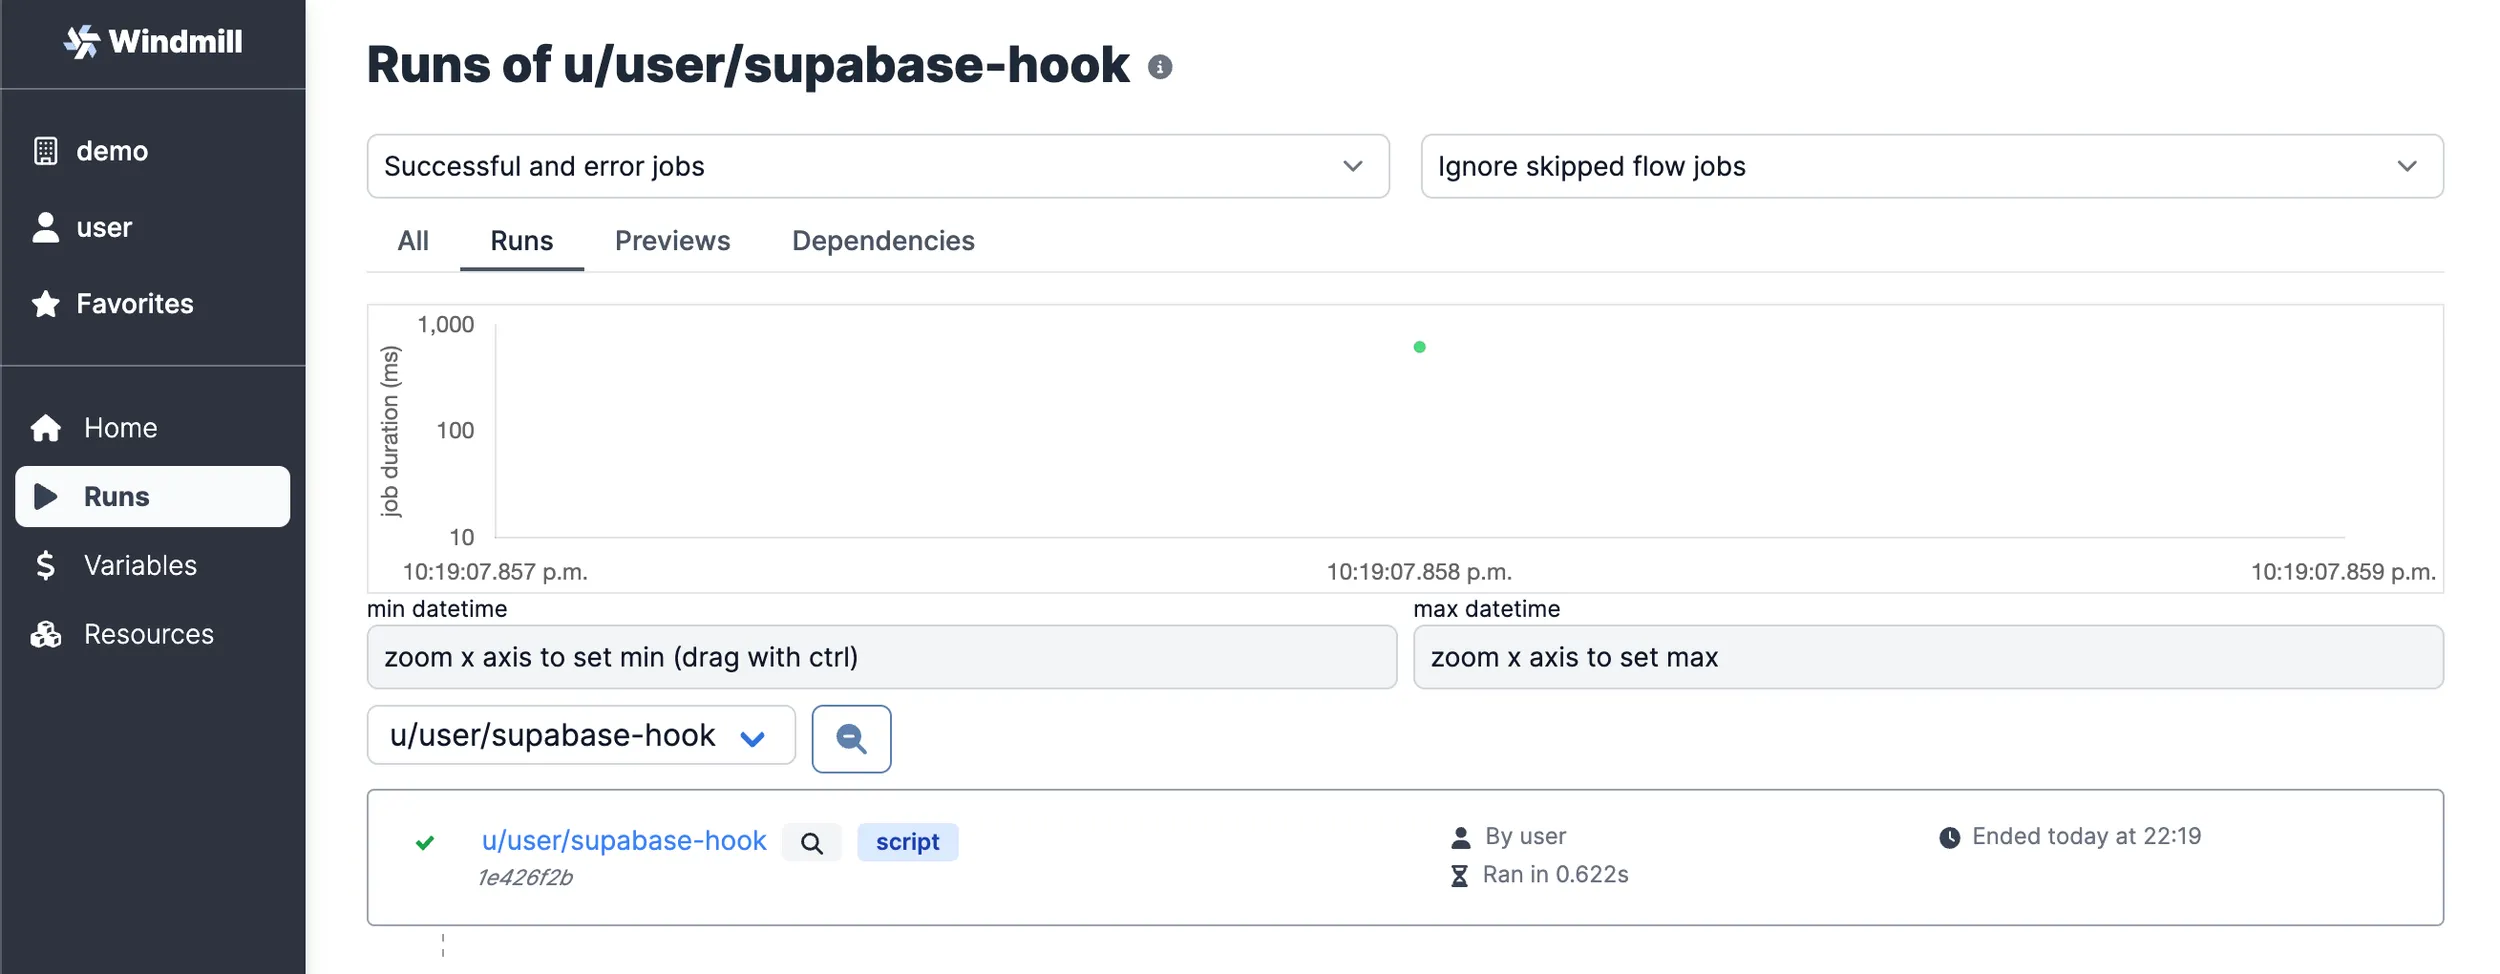
The INSERT event should be propagated to Windmill and trigger the Script. You
can check it on the Runs page in Windmill. If the Script was indeed
triggered, you should see a result like this:
To see more details about the run, click on the name of it and you'll see the payload passed to the Script:
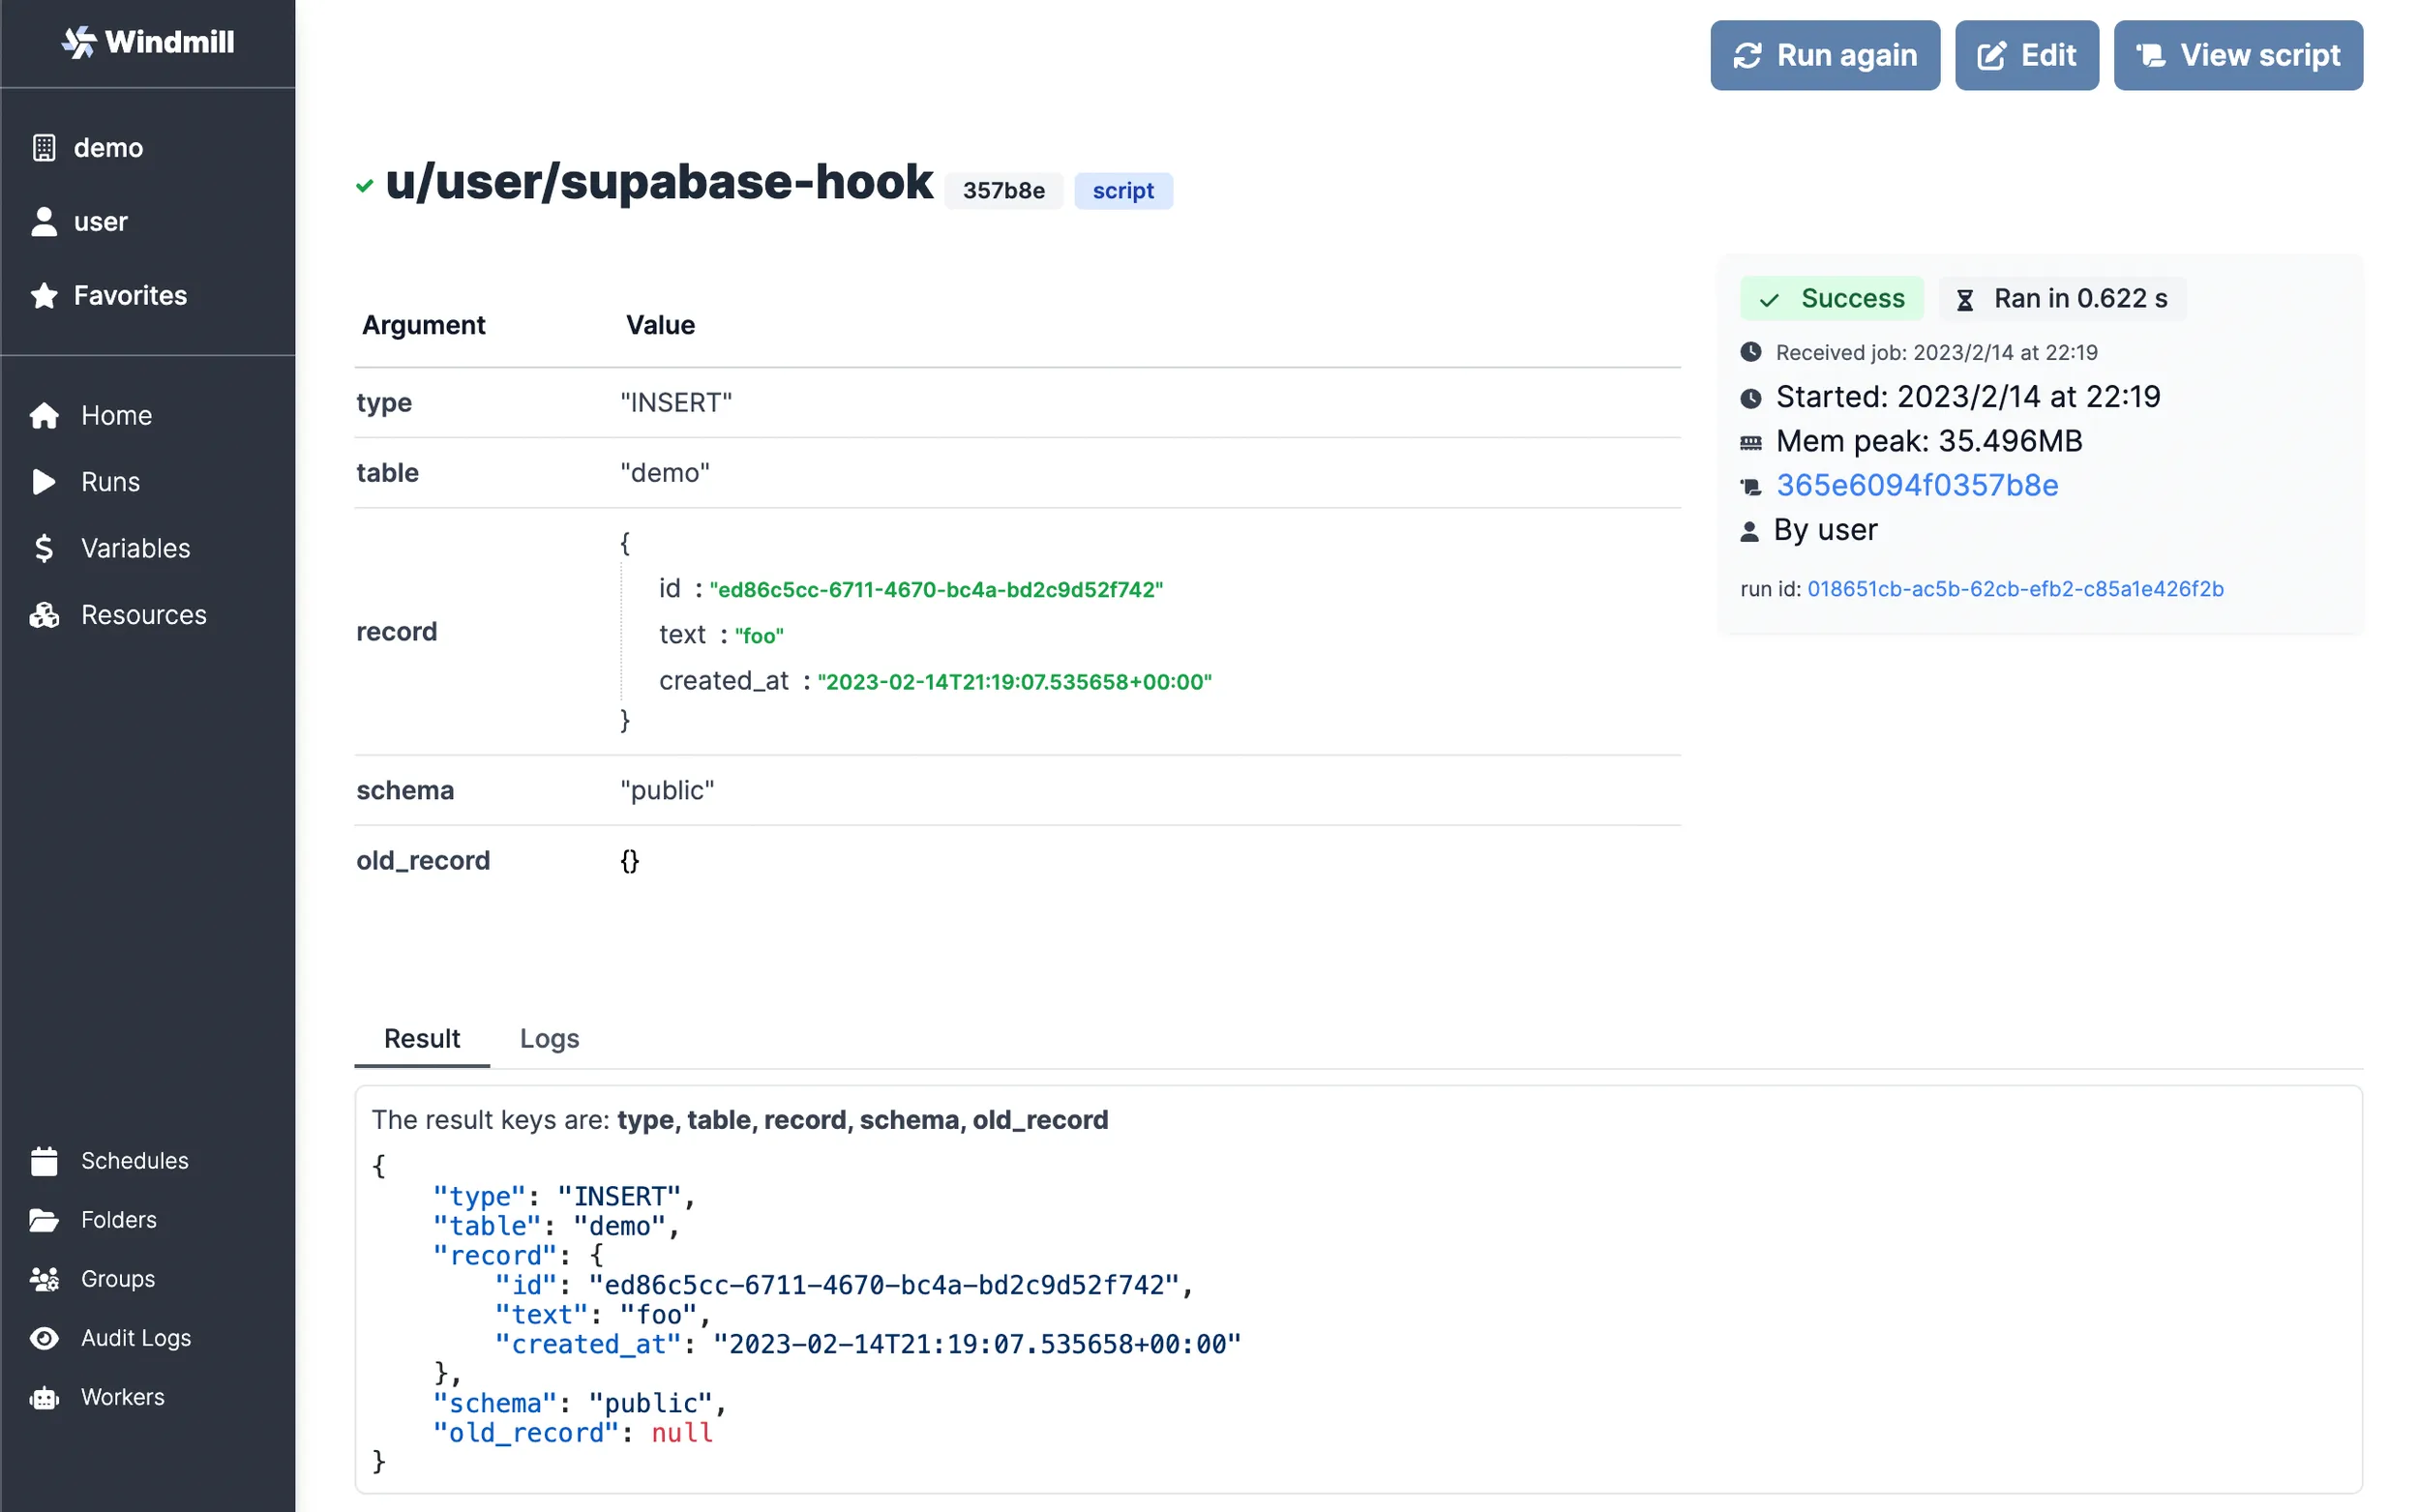
Now you know what kind of information is transmitted from Supabase, so feel free
to check how the payload values change on the UPDATE and DELETE events or
just customize the Script to your needs straight away!
You can self-host Windmill using a
docker compose up, or go with the cloud app.